No doubt that the high-resolution images are the need these days. If you are running any kind of modern blog or magazine, you are most likely aware that some of your visitors might be using Retina displays. These high DPI devices are capable of showing images in great quality and larger size than the average screens.
In order to help you out with the setup for those high DPI screens, we assembled this quick guide to help you out.
What is a Retina display?
Retina displays is a brand name used by Apple for its series of IPS panels and OLED displays that have a higher pixel density than traditional displays.
These screens can display higher resolution photos and in order to serve images with larger resolution (double-sized) just for them.
Install Retina x2 WordPress plugin
The easiest way is to install a plugin that will perform the needed actions. We recommend the WP Retina x2 plugin (https://wordpress.org/plugins/wp-retina-2x/). This plugin will generate the needed double-sized images and will also insert the needed markup for the image elements. So, you don’t need to manually create any images, the plugin should do that automatically.
In order to install this plugin, please navigate to WordPress admin -> Plugins -> Add new. Now, just enter the words “Retina x2” and wait for the results. Once the plugin is listed, click install and activate it. See image:
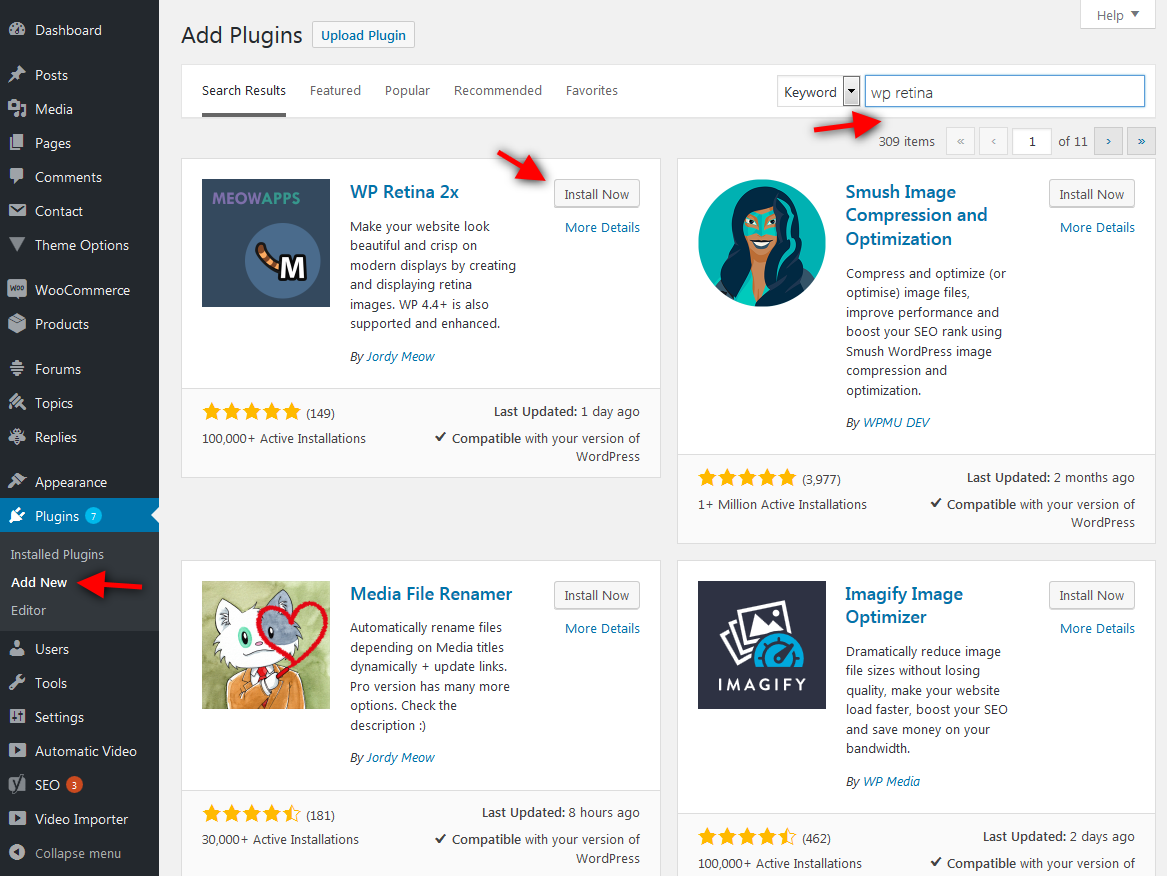
Installation of the WP Retina x2 plugin
Once the plugin is installed, you can access its settings inside the WordPress admin -> Settings. Then, you just need to check the desired image sizes that you want to make retina ready. The plugin will generate the double-sized images and serve them accordingly.

Choosing the right image sizes – WP Retina x2
You can also check the official WP Retina x2 plugins tutorial here: https://meowapps.com/wp-retina-2x/tutorial/
Setup Retina display support manually
There is also a way to utilize javascript to provide the retina images without the usage of a plugin. This method will require that you prepare the images that are double sized manually. You will also need to upload them along with the regular images. Then the script will automatically find the double-sized images and just replace the original ones with the Retina-ready images.
Retina.js
The most popular script for making websites support Retina images is definitely Retina.js
If you plan to use this script, you will need to upload it inside your themes JS folder. Then you will need to alter your theme functions.php file and use wp_enqueue_style to load the script on the front-end of your website.
The script works like this – it will check if the display is Retina ready, then it will search for the Retina image that you have created manually and replace the original one.
Dense.js
This is a jQuery plugin for Retina display that is similar to Retina.js. The script calls the $.fn.dense() initializer method and it targets the image elements. It will serve the Retina-ready images where needed.
Conclusion
The easiest way to make your WordPress blog or magazine Retina display ready is to install the WP Retina x2 plugin. If you don’t want to use the plugin, you will need more time to prepare the images, especially for the Retina displays. It will also require a small tweak on the theme in order to make it work.