Trawell template kit documentation
Introduction
Welcome to the Trawell template kit documentation by Meks.
If you’re having an issue and can’t find the answer here, please contact us and we will try to answer as soon as possible. Also, feel free to suggest any new features you may want in this template kit and we will consider adding them in one of the next updates.
We have put a lot of effort into making this template kit, so please don’t forget to rate Trawell on ThemeForest if you like it.
Cheers,
Meks Team
Requirements and recommendations
In order to use the Trawell Elementor template kit you need to make sure your WordPress website has the following plugins installed:
You can use any WordPress theme that supports Elementor, but we recommend using the Hello Elementor theme for the best results.
Installation
Step 1
Download the template kit zip file from ThemeForest to your computer.
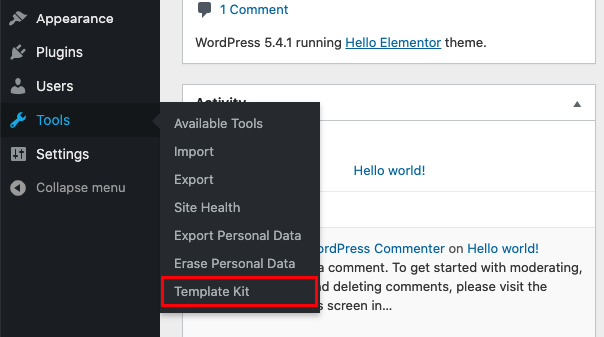
Step 2
In your WordPress dashboard go to Tools > Template Kit and click on the “Upload Template Kit Zip File” button. Choose your zip file from step 1 and the upload will start.
Step 3
Once the file has uploaded you can choose the templates. For each of the templates that you’d like to import click the “Import template” button. Once you’ve done importing you can start building your website!

Please note that you don’t need Elementor Pro for all of the templates, but most templates require Elementor Pro to work correctly.
Setting up the header and footer
Please note that you need Elementor Pro to use the header and footer templates.
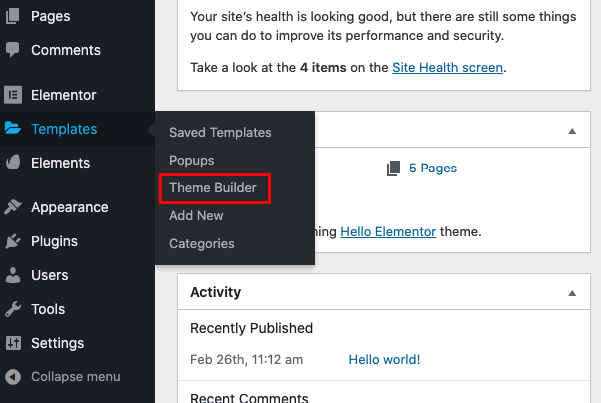
Step 1
Go to Templates > Theme Builder and find the header template you want to use.
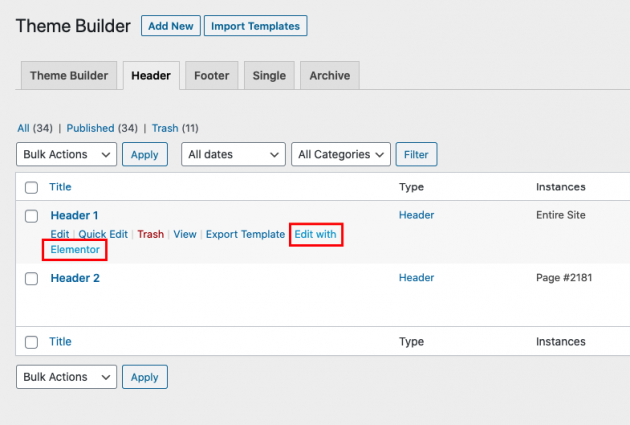
Step 2
Click “Edit with Elementor”.
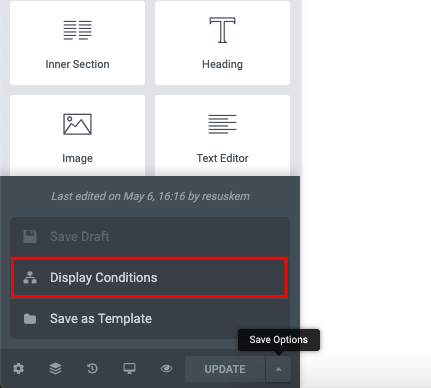
Step 3
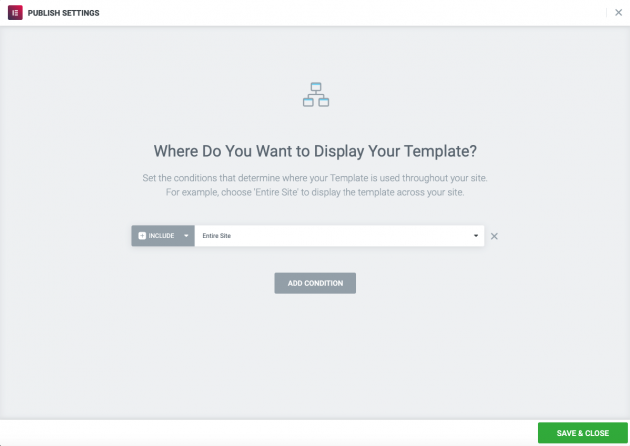
When the Elemento editor opens, click “Save options” and then “Display Conditions”.
Step 4
If you’d like for this header to be displayed on your entire website, set the condition to Include > Entire Site and then click “Save & Close”.
For more information about working with display conditions, please reffer to the official Elementor documentation.
Repeat the above steps for the footer.
Setting up the archive and single templates
Please note that you need Elementor Pro to use the archive and single templates.
Step 1
Similar to the header and footer templates, you set up your archive and single templates by going to Templates > Theme builder and then clicking the “Edit with Elementor” button on the templates you want to use.
Step 2
Once you’re in the Elementor editor you need to set the Display Conditions. If you want the archive template to apply to all of your archives select Include > All Archives. For the post single template, you’ll select Include > Post > Posts and for the page single template, you’ll select Include > Page > Pages.
Again, the official Elementor documentation can help you if you want to build a more complex setup.
Building the pages with templates
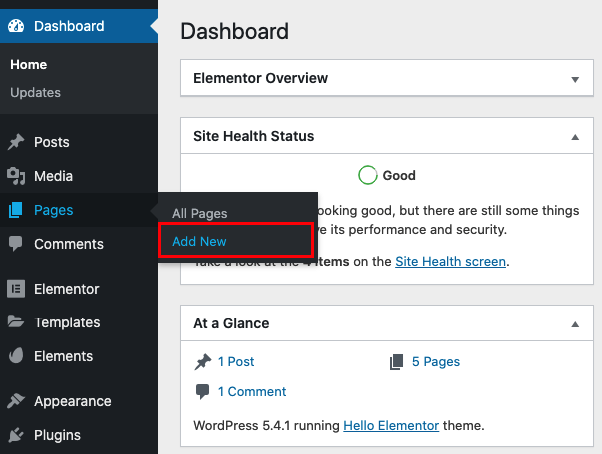
Step 1
In your WordPress dashboard go to Pages > Add New. This will open the WordPress editor. Give this page a title and press the “Edit with Elementor” button.
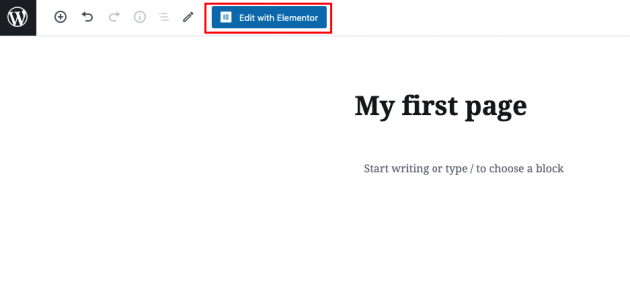
You are now in the Elementor editor. It’s time to build your page with the template you’ve imported earlier.
Step 2
Click the “Add template” button

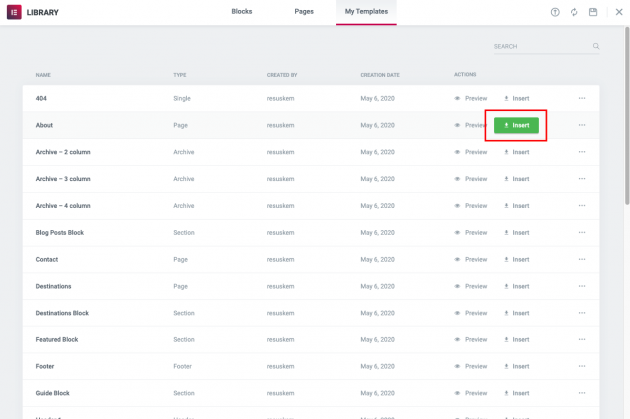
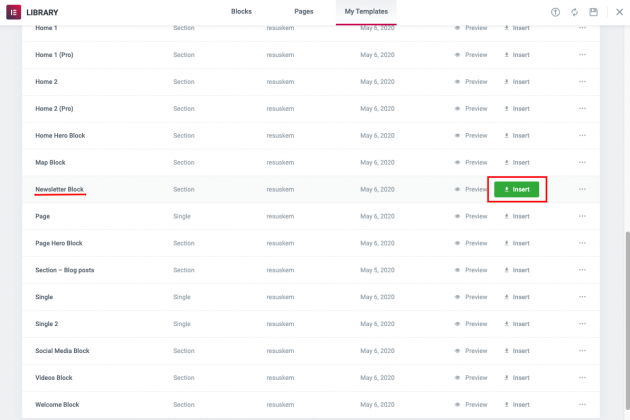
Step 3
Click on “My Templates”, find the template you want in the list and click the “Insert” button. Voila – your page has been created! At this point, you’ll probably want to replace the placeholder content with your own and perhaps tweak the layout.
Step 4
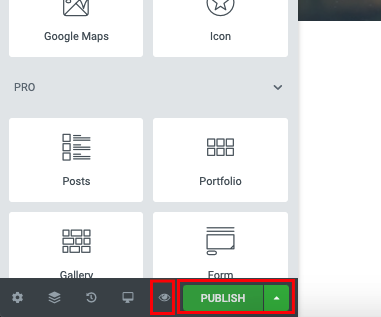
Once you’re done with customizing the page simply click the “Publish” button and then “Preview Changes” to see your new page in action.
Repeat this process for all of your pages.
Building the pages with blocks
You have an alternative method of building pages in Elementor. Instead of using pre-built page templates, you can build your own creation by using the imported block templates. Blocks are what pages are made of in Elementor.
Step 1
Create a new page and go to the Elementor editor, as described earlier. Now when you click the “Add template” button and go to “My Templates” choose a block template to insert.
Step 2
Repeat this for all the blocks you need on the page. Keep in mind that you can easily customize and reorder the blocks at any point.
Step 3
Once you’re done click the “Publish” button and then “Preview Changes” to see your new page in action.
Happy building!
Changelog
Version 1.0
- Initial release
Image licensing
This Template Kit uses demo images from Envato Elements. You will need to license these images from Envato Elements to use them on your website, or you can substitute them with your own.