Some of your guys and gals might wanna control the access of your content based on certain membership levels, this article aims to describe the way to setup Membership based website for both free and paid subscribers using Simple Membership plugin. Plugin can also be used with other Meks themes as well.
Install Simple Membership plugin
First step is the installation of this plugin and the easiest way is to navigate to WordPress admin -> Plugins -> Add new.
Once you open up this page, look for the search form in the right side of the screen and enter “Simple Membership” and hit Enter. The page should display results and you should see the plugin listed below, click install and activate the plugin. See image:

Once you install and activate the plugin you will notice new admin menu item “WP Membership”. Just navigate to WordPress admin -> WP Membership -> Membership Levels. See image:

You can add new level of access, adjust expire time and other desired content restriction for members group etc. Then you can navigate to WP Membership -> Settings. This page contains all plugin settings and you can activate the membership mode, adjust desired parameters for your small community, setup welcome emails and payment options and plans. Make sure that you go thru each of the settings tab to get familiar with various features that are shipped with this great free plugin.
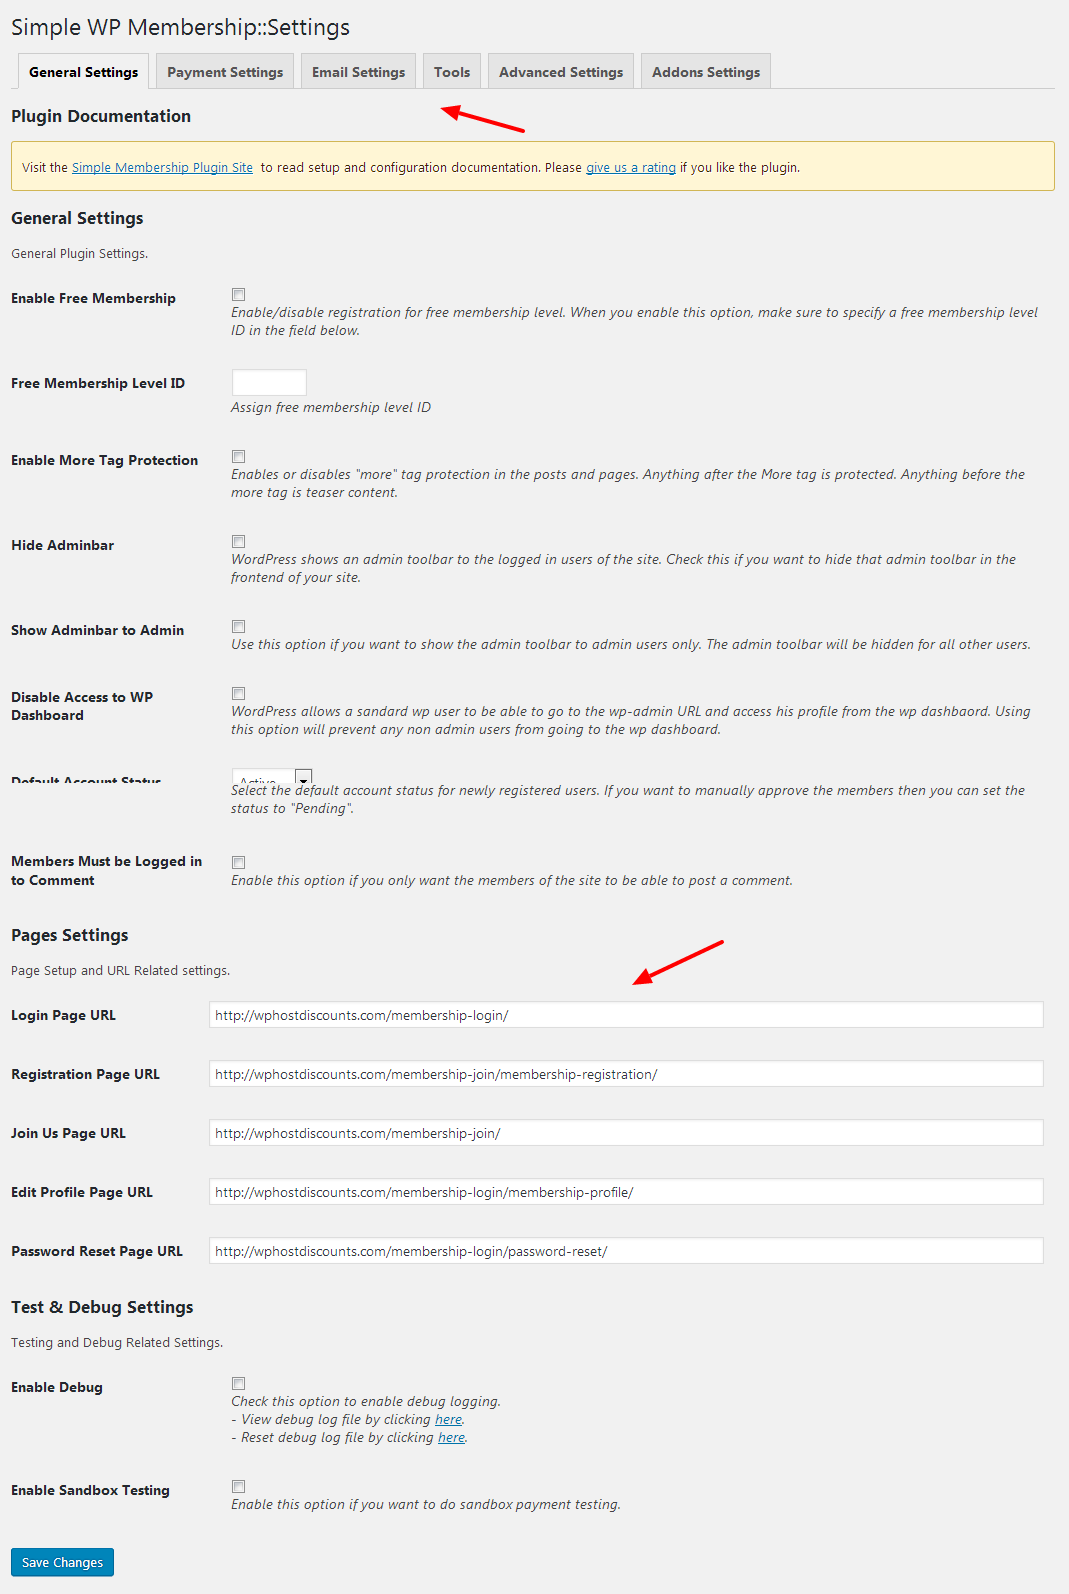
You can also change the slugs and URL of your desired membership pages and setup automatic user account re-activation and more.
Setting up your membership pages
Plugin created its needed membership pages upon activation and you can alter their slug or add your content and replace default ones inside WordPress admin -> Pages -> All Pages. Here just look for the new pages related to the membership and open them up for editing. For example, open up the Join us page for editing. See image:
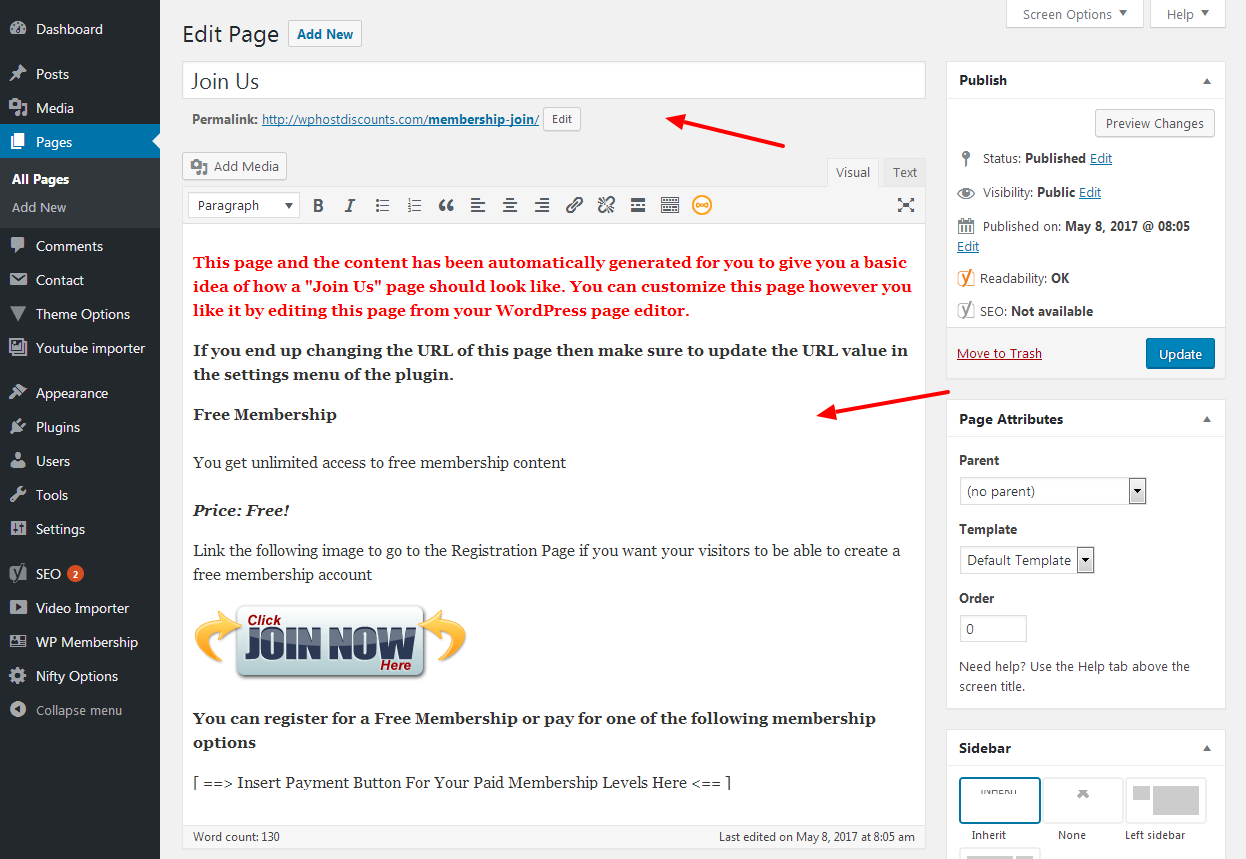
You can alter any part of this template page and make it work best for you.
Once you setup the other pages to look in the way you want, you can proceed onto the next step, adding the links in to the navigation menu.
Add membership links into main menu
In order to add your membership links like login, registration, profile and etc. into the main navigation menu, just go to WordPress admin -> Appearance -> Menus. Once here, just fine the main menu of your website that is assigned onto the main menu slot and open it up for editing. See demo image:
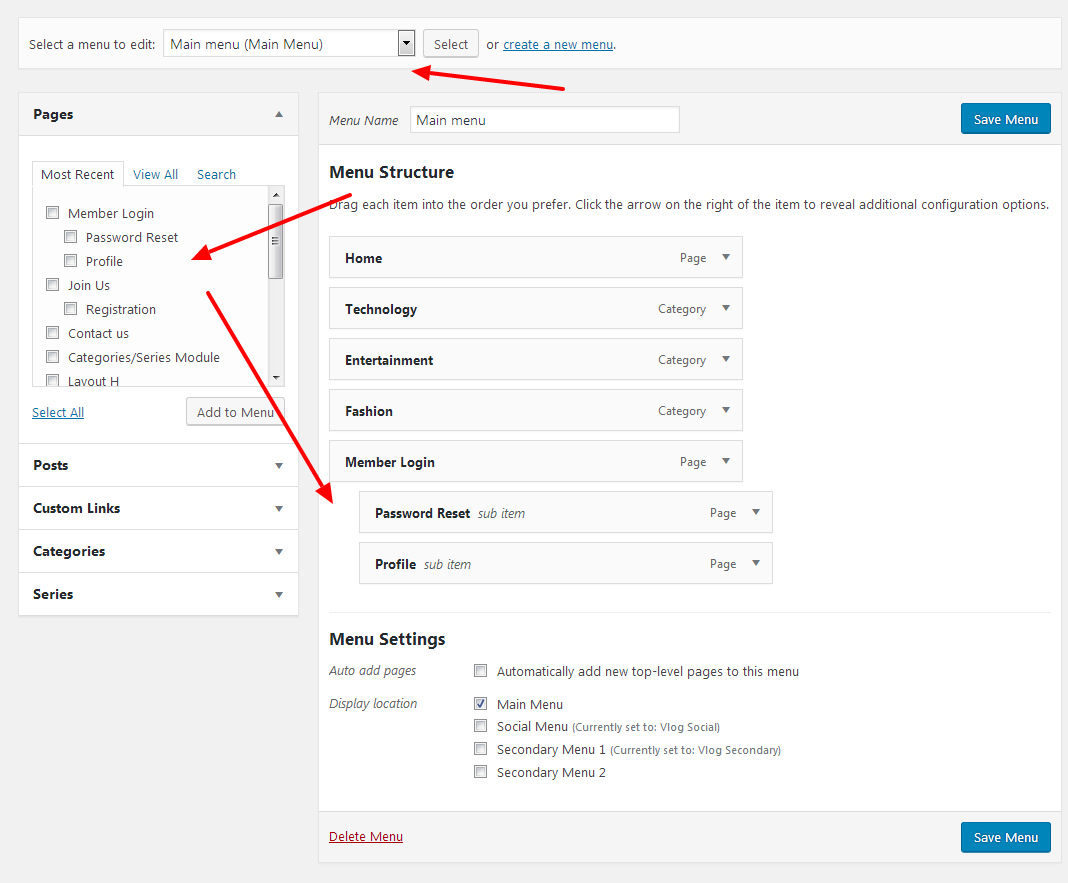
Once you add pages from the left sidebar onto the menu and re-position them, save changes.
Conclusion
You will now have fully functional membership website and your users should be able to register and login using the provided links in the menu. Once you setup the needed access level you can start limiting the access to certain content and start monetizing your website.
Be sure to check upon WordPress repository regarding the Simple Membership plugins add-on’s. There are many additional 3rd party plugins that can extend features of this great free plugin.