This article aims to explain the process of adding a custom MailChimp signup form using embed code and widgets. In order to add a signup form this way, you’ll need to have a MailChimp account.
MailChimp sign up form code
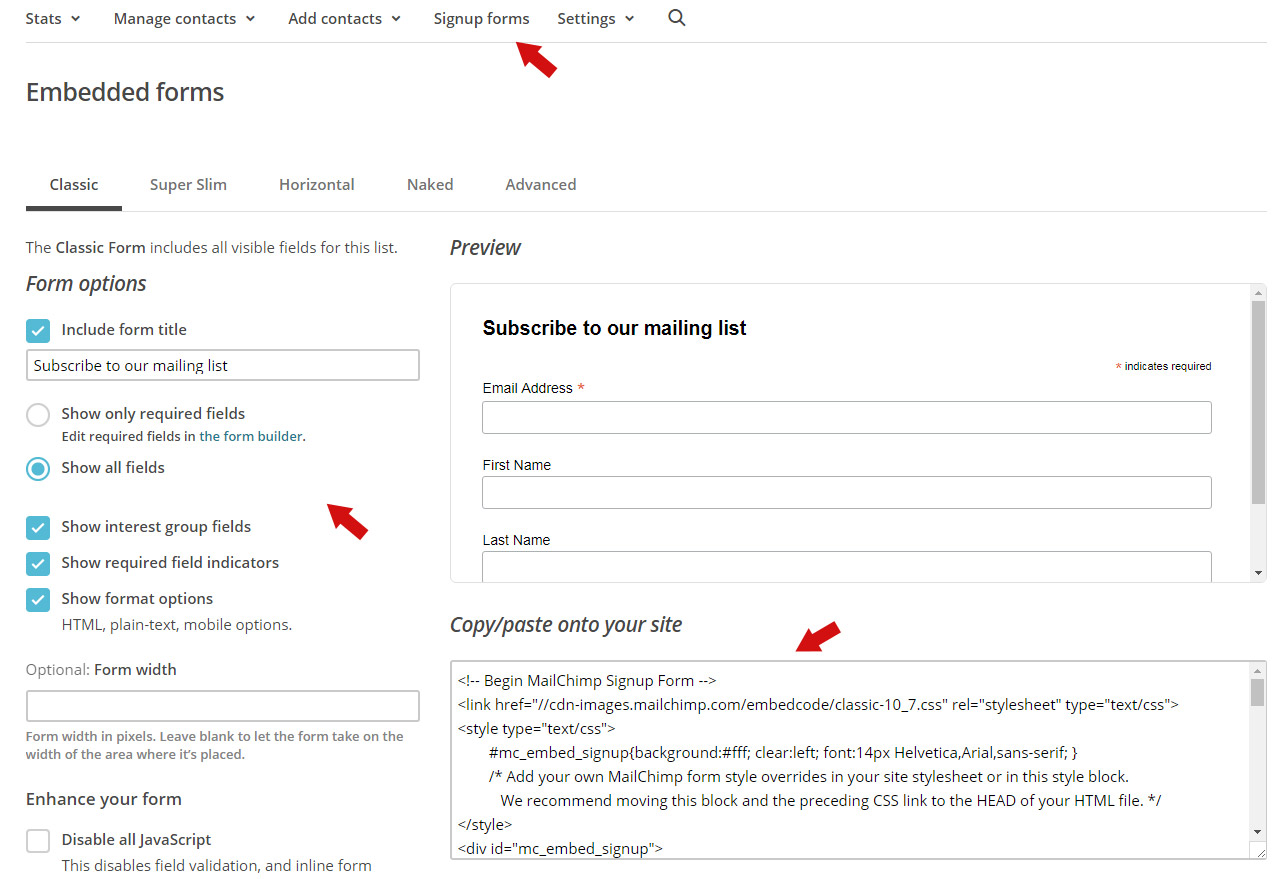
The first step is to log into your MailChimp account. Then you need to create a new list if you already don’t have one and once you create the list you can open it up for editing. Once you are on the list page, you will notice some links above the list details and one of those link contains the “Sign up forms” option, click on that option and you will get redirected to the page with Signup forms and you need to choose Embedded forms here. You will only need the embed code here, so just copy and paste it in the Notepad or on someplace where you can save your texts or embed codes for later use. See image:
Adding the embed code to the widget
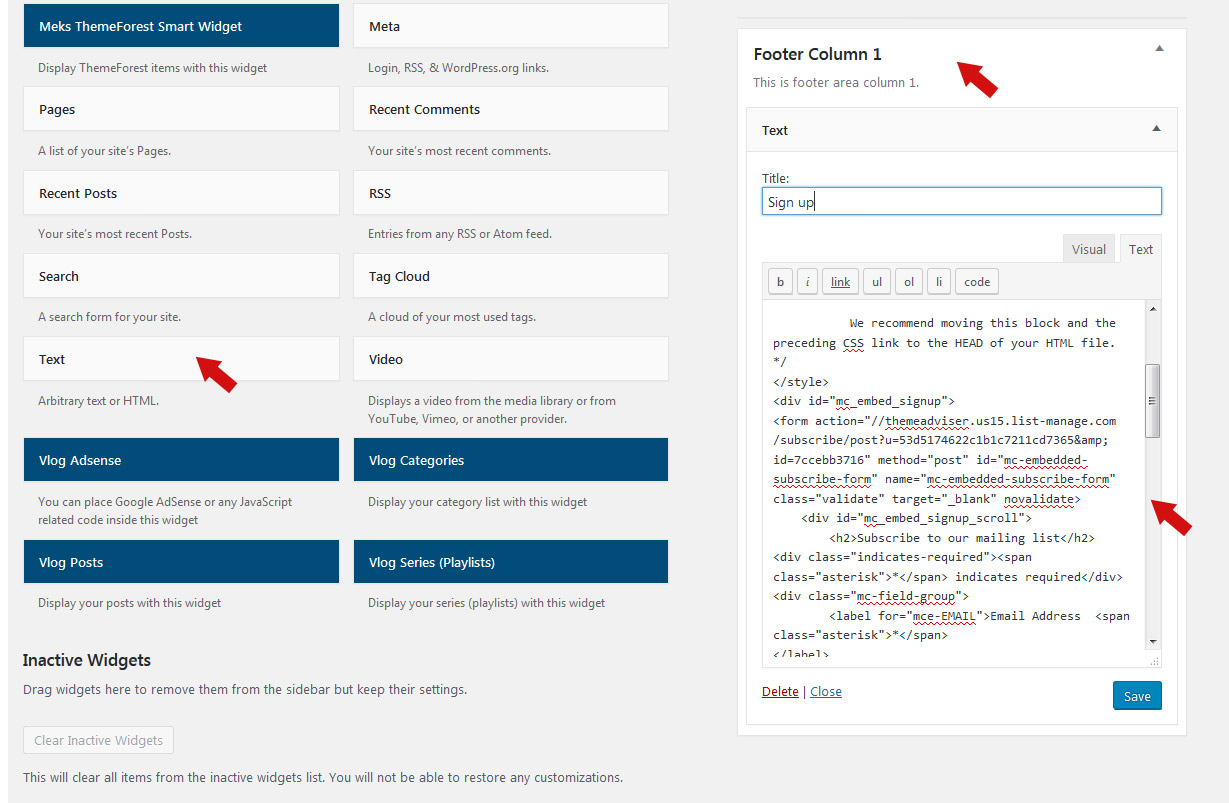
Once you have generated an embed code for your sign up form, you can access your WordPress website admin and navigate to WordPress admin -> Appearance -> Widgets. Here you need to create a new text widget and place it into the desired position. For example, our Vlog and Gridlove theme have signup forms added to the footer area. So, you can create a new text widget, paste the embed code inside it and place it in the footer sidebar position of your choice. See another image:
Once you add the code and save changes, you can tweak the overall look of the sign-up form and if you find some specific issues regarding the styling you can remove the part of the embed code that is related to the styling setup. It starts with
1 | <style> |
and ends with
1 | </style> |
, so you can remove that part of the code and save changes.