Google published a new version of Google Analytics, named Google Analytics 4, in October 2020. The update comes with an overhaul of its interface and changes to its tracking code. If you wish to get familiar with the new version of Google Analytics you can check out Google’s own video guides on the new interface. You can also set up a new property in the existing Analytics account and click through the new version on your own.
In the official Google Analytics video, you can see how to set-up a Google Analytics 4 property with either a universal version of gtag.js tracking or with a Google Tag Manager (GTM) account.
What are the differences between Universal Analytics and Google Analytics 4?
One of the biggest differences between traditional Universal Analytics and the new Google Analytics 4 is the user-interface.
Traditional Analytics features three tiers of data organization (Account > Property > View) but now there are only two: Account and Property.
How to set-up Google Analytics 4
Before you start with Google Analytics 4, you should create a Google Analytics account.
- Sign into the Analytics account with your website’s existing property.
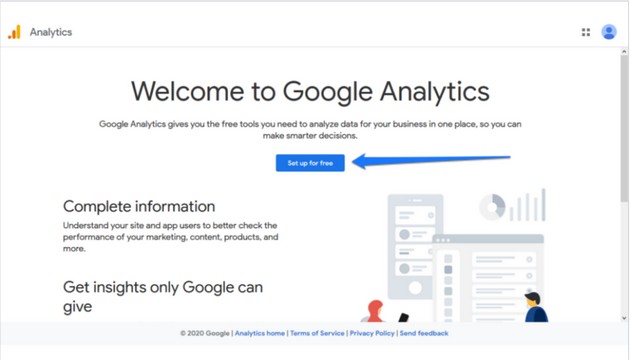
If you already have one, simply use it to log in. If not, click the button to sign up and create a whole new account. Once done with either, you will see the screen below. Hit the big blue button to get started.
2. Navigate to the Admin section and in the Account column, select the account in which you want to create the property or create the new Account.
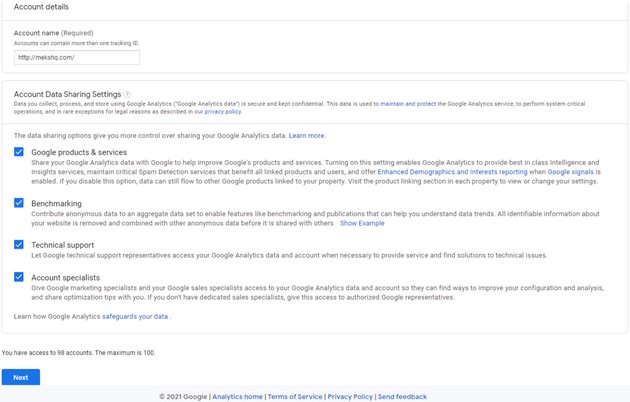
Note: your account can contain several websites for tracking. Consequently, an appropriate account name can be something like a site name, or just a site URL.
You can disable all the data sharing options. You may want to keep the first one active if you are planning to use the enhanced demographics and interests report.
3. In step three, you have to set up a Property. This is a connection to your website that you want to track with Google Analytics. You need to enter a property name (for example, the name of your website) at the top and the site URL at the bottom.
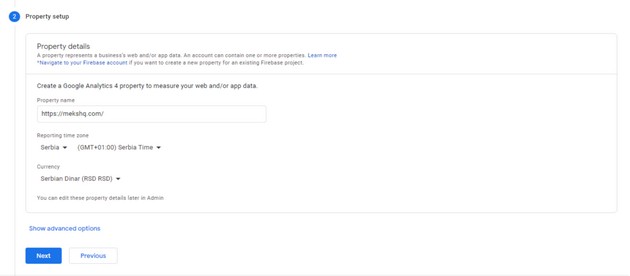
If you are planning to connect your WordPress site via a plugin, at this point in time, you need to create a property using the older version of Google Analytics (called “Universal Analytics”).
To do that, click on Show advanced options. This will open up a new panel where you can toggle to create a Universal Analytics property.
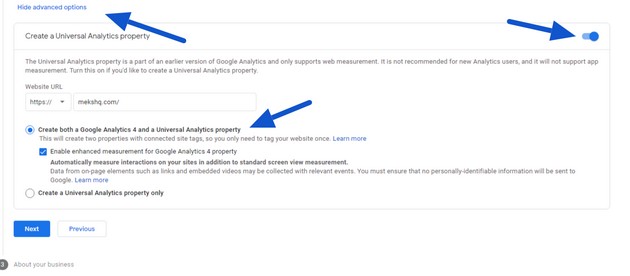
If you plan to have more than one website, it probably makes sense to create both properties for Google Analytics 4 as well as its earlier version, so you can leave that option enabled.
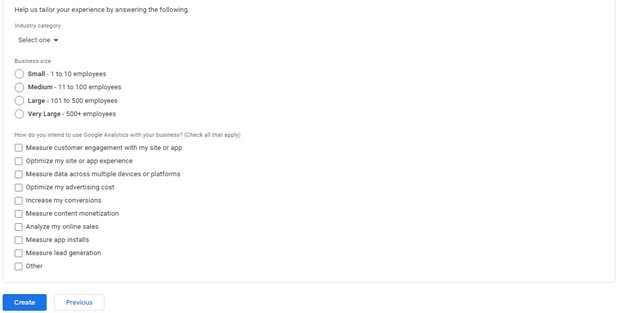
4. In step four, Google Analytics will ask you for some more information about your website/business. This is optional and you can skip this section by clicking Create at the bottom. Or, input an industry category, the size of your business, and goals for using Google Analytics.
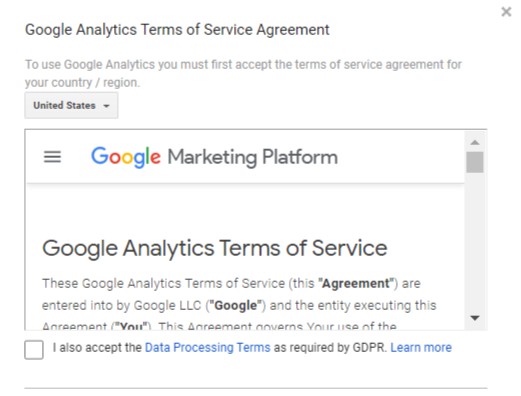
Once you proceed, the page will display the terms of services and data processing terms, which you need to accept.
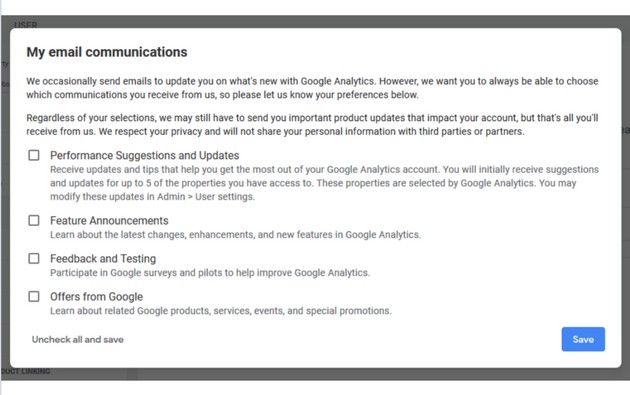
This will take you to your account, where the first step is to configure what email communication you want to receive from Google Analytics (it’s fine to leave it all empty and save).
5. Now you have to set up a data stream. This is the term Google Analytics uses for sources of data you want to track. It can either be an iOS or Android app or web property. These are also the three choices Google Analytics will give you. But if you set up both kinds of Google Analytics properties, this step will be done automatically and all you need to do is find your respective ID and tracking code.
6. Now you get your measurement ID and the Tracking code
![]()
If you are using Universal Analytics, you find that same information under Admin > Property > Tracking Info > Tracking Code.